Team Umizoomi Coloring Pages Free Blue Borders Art Deco Stylized
The following is a tutorial on how to apply Adobe Illustrator to catechumen a hand-drawn illustration into a digital graphic. More specifically, we will employ Illustrator's Image Trace function to convert a drawing into a vector image. A vector paradigm is made upwards of a big set of points that can be infinitely scaled (up or down in size) without losing resolution.
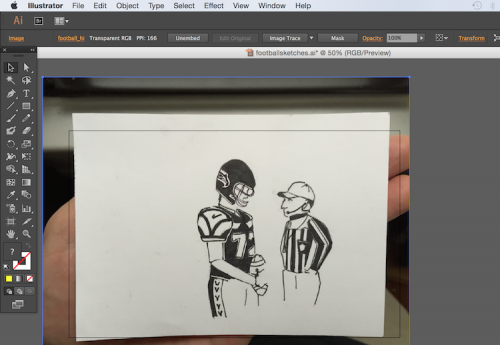
To start the process of preparing the analogy for spider web, take a high resolution photograph (viii.iii megabytes) with an iPhone 6. We didn't have a scanner on hand.
Setting upwardly the canvas
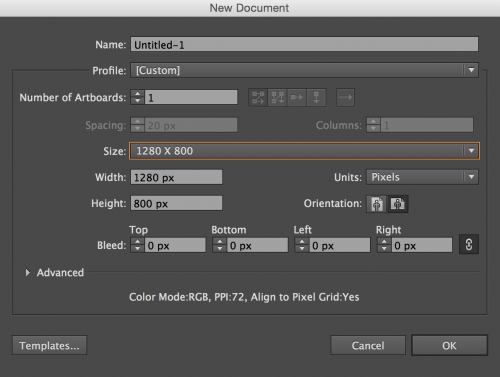
In Adobe Illustrator, open up a new file with its profile fix for Web, its size set to 1280 x 800 pixels, and its orientation set to landscape. This is a big enough canvas to create an image large plenty to be gear up as a feature image on Storybench.
Upload the photograph by clicking Place…in the File menu.
Cropping the photo
Nosotros want to employ the Clipping Mask function to crop the photograph and remove all the excess data that makes no sense to trace or even include. In theObject menu, click Clipping Mask and so Brand.
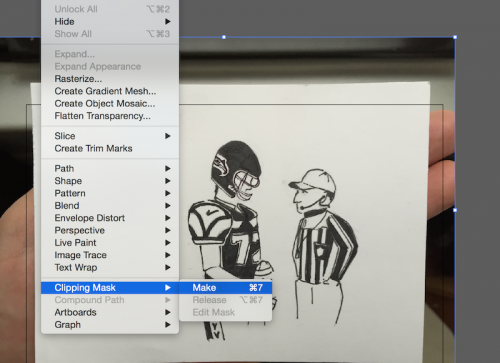
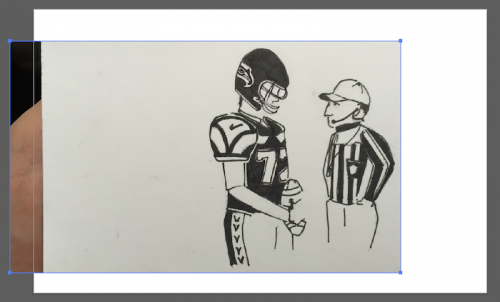
Then elevate the borders to crop the photo.
Catechumen to grayscale and rasterize
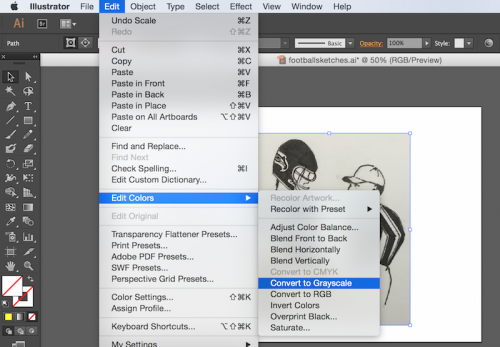
Side by side nosotros convert the cartoon to grayscale, which I am told makes it easier to trace past the Adobe Illustrator. In the Edit menu, select Edit Colors so Convert to Grayscale.
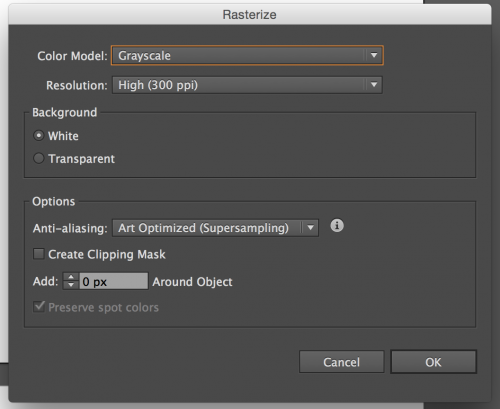
Next, rasterize the image so you lot tin trace the image. Click Rasterize… under the Object menu. Select Grayscale under Colour Model.
Tracing the epitome
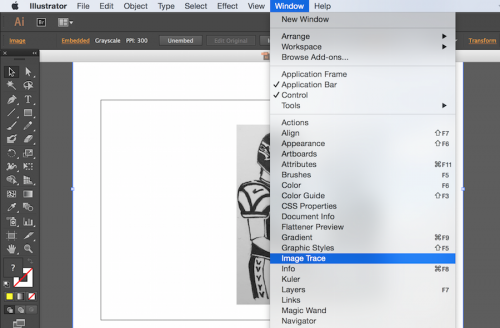
At present for the fun role. With the analogy selected, click Image Trace in the Window menu.
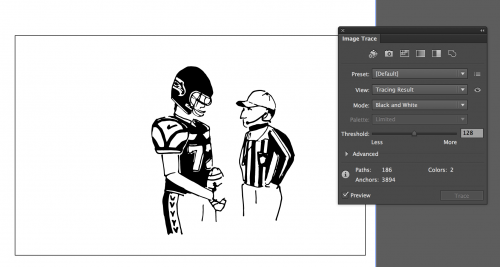
Next, click the checkbox adjacent to Preview. By sliding the Treshold push you can make the lines thicker or lighter.
Next we desire to convert the traced image into a vector, i.e. a set up of points. Go to the Object menu, select Image Trace, and click Expand.

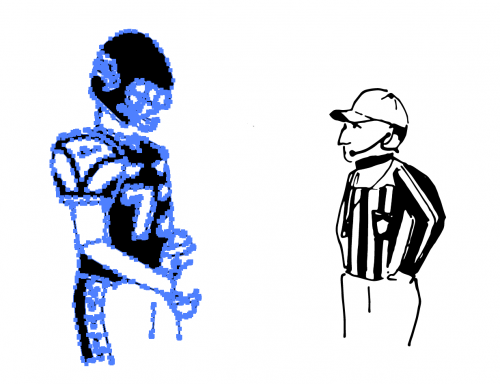
A closer look reveals the points that make up each slice of the analogy.

Ungroup the points
Next, nosotros desire to ungroup the points. This volition allow us to move around private elements or smaller subsets of points, similar if nosotros want to motion the referee further away from the player. Select Ungroup under the Object menu. Sometimes yous may need to ungroup several times.
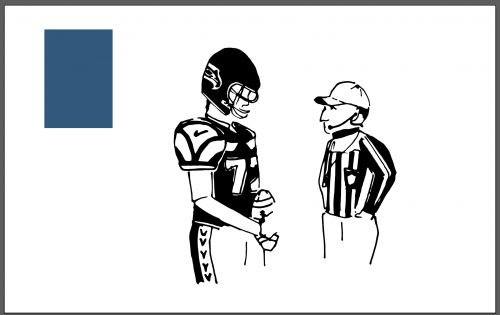
Nosotros tin can likewise select subsets of points and regroup them. In one case you've selected this subgroup (using the Shift key to help), clickGroup under the Object card. Here we've moved the player away from the ref.
Adding colour
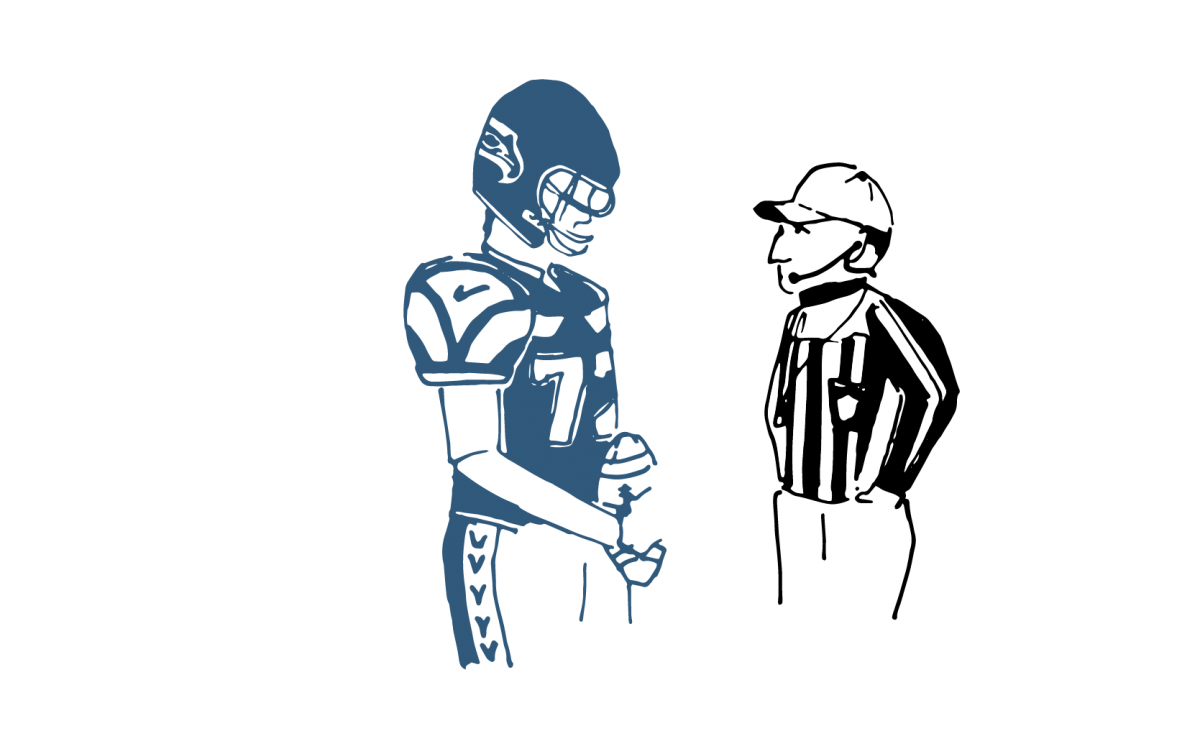
Since the football game role player was modeled later a Seattle Seahawks role player, we decided to make him the Seattle Seahawks blue. To re-create a color from an image, File >Identify… a screenshot of the color on your canvas. (I took the screenshot from a Seattle Seahawks logo).
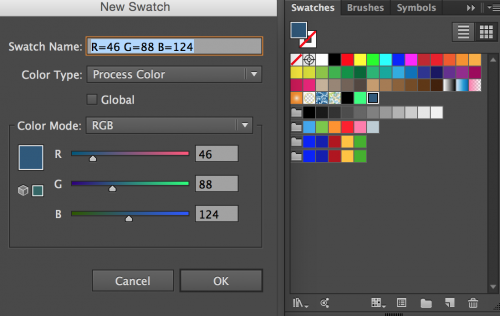
To brand a swatch with this specific shade of blue, we want to open the Swatches box from the Window menu. So, click the eyedropper tool in the left carte and click the screenshot of the color.

It will testify up equally the primary color in your swatch box. Click the New Swatch icon which is on the lesser-right, just left of the trash tin icon. It will ask you to save the new swatch. Click OK. Now it will be saved on your list of colour swatches.
Select the football player by dragging the Option tool (or black pointer on the summit left) beyond all the football game role player points. When the role player is selected, click the new swatch you've just created. Voilá.
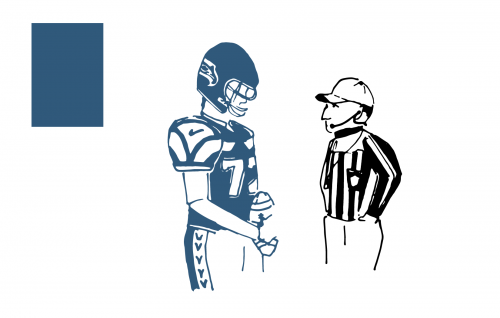
Delete the screenshot of the color and export your paradigm using File > Export…
Some important options here. Make certain Use Artboards is selected to include the full canvas that you take been working on. If it is unchecked, the prototype exported will only be as alpine and wide as the elements you've traced, i.e. the role player and ref. Click Consign. On the following PNG Options box, yous take the option of selecting White, Blackness, Transparent or Other from the Groundwork Color dropdown menu. Transparent is slap-up for superimposing PNGs over other images.
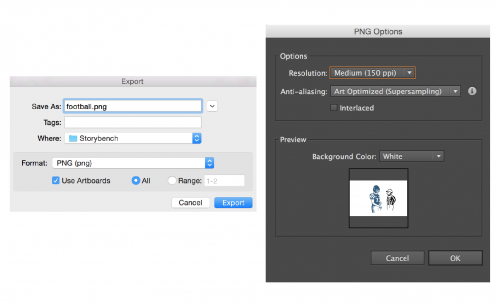
Nosotros chose white and ended up with this:
All images cheers to Luna Bajak.
- Writer
- Recent Posts
Storybench's editor is Aleszu Bajak, a science journalist and former Knight Science Journalism Fellow at MIT. He is an alum of Scientific discipline Fri, the founder of LatinAmericanScience.org, and is passionate nearly breaking down the dissever between journalists, developers and designers.
Source: https://www.storybench.org/how-to-convert-a-hand-drawn-illustration-into-a-digital-graphic/
0 Response to "Team Umizoomi Coloring Pages Free Blue Borders Art Deco Stylized"
Post a Comment